 Follow
Love these DIY ideas as much as we do? Stay up to date on our latest findings by liking our facebook page at Home and Heart DIY Facebook!
I am a reformed nail biter! I do my best, but the first sign of a chip or hangnail, those babies are gone! This Bail Band-Aid Tutorial is truly terrific and I believe it will save my nails!
Putting this to use right now! I will no longer let broken nails push off the wagon into the world of nail biting! Find the pictures and step by step tutorial- Random Tuesdays
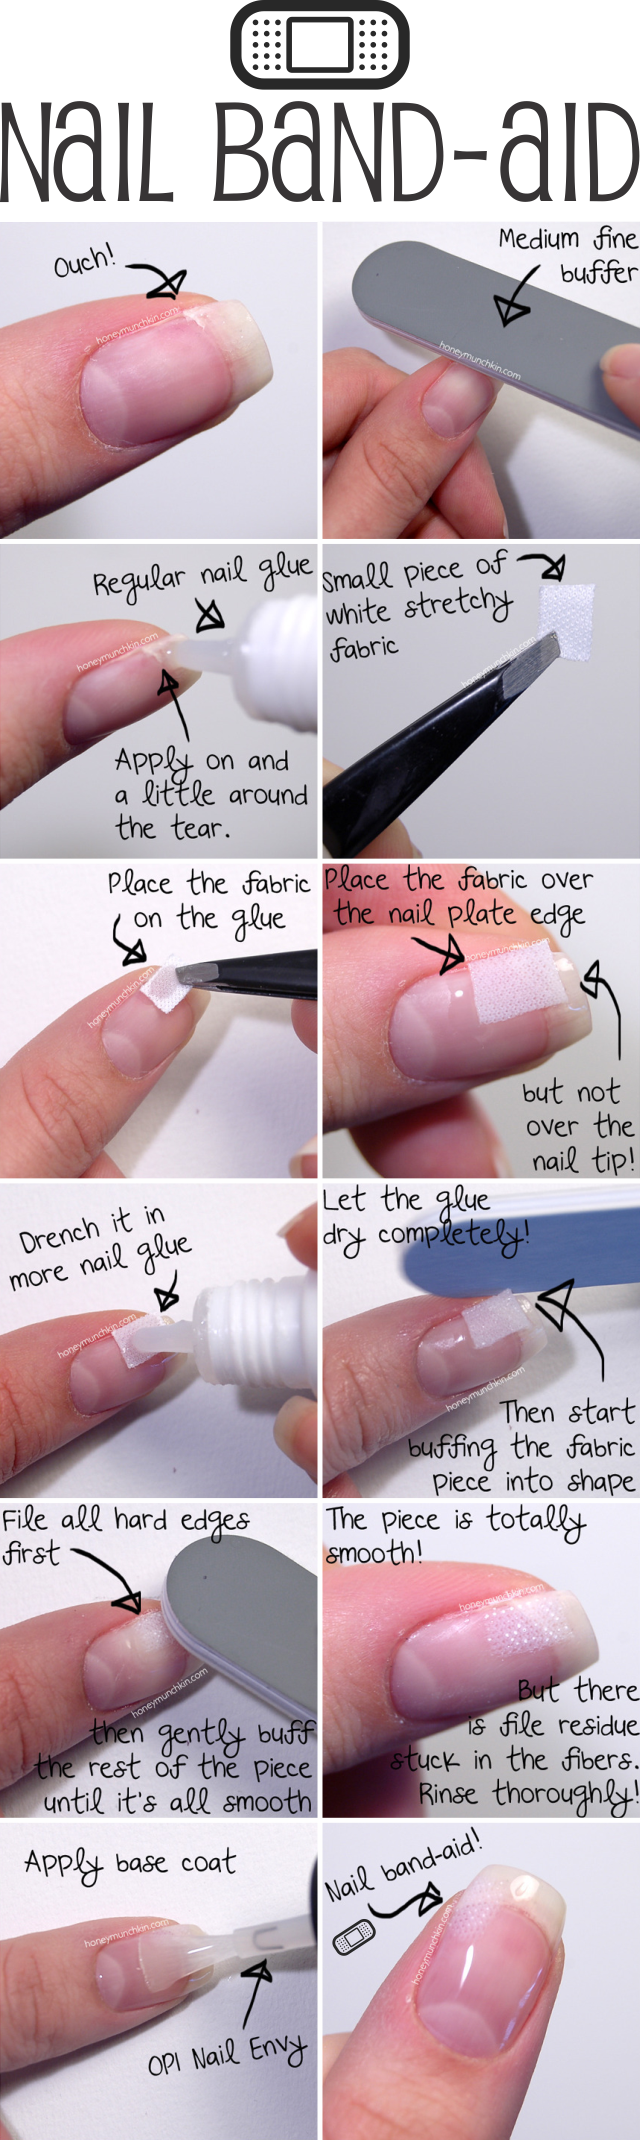
What kind of fabric is used on the nail Band-Aids?
You need an unused teabag, nail glue, a small pair of sissors, tweezers and a fine Emory board. Empty the tea leaves out of the bag, then cut a piece large enough to fit over the break in the nail. Place a drop of glue on the nail, then place the piece of bag over it, then put another drop on top and let it dry. After it’s dried put one more drop on and after that’s dried use the emoryboard to smooth out any lump and the edge of the nail. Now you’re ready to paint your nail if you want. The whole process shouldn’t take more than 10 minutes. Hope this helps.
This is so saving my pretty nail. What kind of fabric?
What Krystlr said?? What type of fabric?
Yep, I use clean Lipton teabags to do this, sometimes paper towels (but only 1 sheet, not both). Works like a charm every time.
UNUSED TEABAG FABRIC!!!!!!!!!!!!!!!!!!!!!!!!!!!!!!!!!!!!!!!!!!
What if you don’t have nail glue? Could you substitute with super glue of another glue?