How to paint laminate furniture

Love these DIY ideas as much as we do? Stay up to date on our latest findings by liking our facebook page at Home and Heart DIY Facebook!

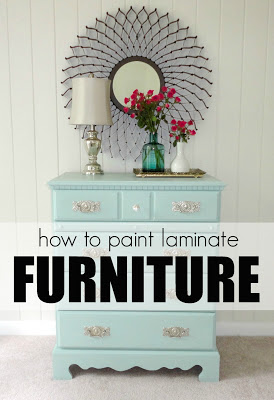
Upcycling furniture can be a great inexpensive alternative to buying something new, that looks vintage, rustic, or shabby chic.

how to paint furniture (1)

LiveLoveDIY has a great tutorial that shows you in 3 easy steps on how to paint laminate furniture. Now you don’t have to worry about making sure all that cute furniture with potential is indeed real wood. Lets be honest, sometimes it is really hard to tell. So, here’s to cute new furniture projects!

DIY Tank Top

Love these DIY ideas as much as we do? Stay up to date on our latest findings by liking our facebook page at Home and Heart DIY Facebook!

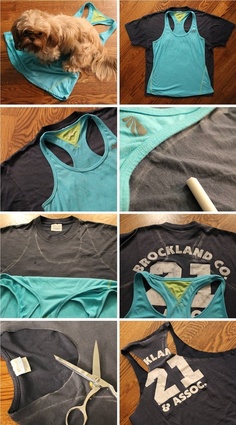
Old Tee New Tank

As you all know, around here we love to add new life to old things – clothes in particular. Why go spend a bunch of money when you can create new clothes right at home?! For this DIY, you’ll need chalk, an old tank top (for the outline), an old beloved t-shirt, and some scissors.

Trace the outline of the tank top onto the t-shirt with the chalk, then cut along the chalk line. That’s it! You’ve got a vintage-y broken in tank top (which are the best kind!)

Thanks to Pinterest for this awesome idea!

DIY Bejeweled Collar

Love these DIY ideas as much as we do? Stay up to date on our latest findings by liking our facebook page at Home and Heart DIY Facebook!

The collar is something that is being played up more and more – especially for the fast approaching fall season. There are even collar necklaces out there – which I happen to love! This DIY takes an old unused thing (CD’s!) and dresses up a shirt to look like new!

Take some old CD’s, and soak them in water for 10-15 minutes. Take them out of the water and with a pair of scissors, begin to cut your CD into pieces, as big or as small as you’d like. As you cut, you’ll notice that the CD will start to separate, there will be a holographic layer and clear layer, throw the clear layer away and only use the holographic pieces. Arrange the pieces first on the collar before glueing. Then using a super glue, or embellishing glue, apply glue to the bottom side of piece, place it on the collar and press firmly. Do this until the collar is covered.

Bejewled Collar

(Source)

Map Lamp

Love these DIY ideas as much as we do? Stay up to date on our latest findings by liking our facebook page at Home and Heart DIY Facebook!

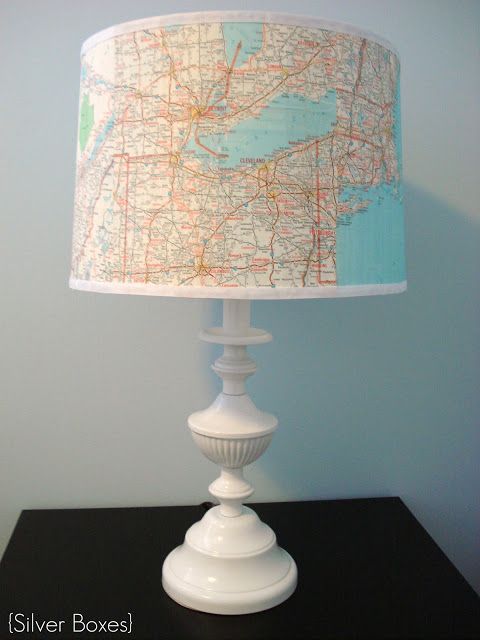
This is one my favorite DIY’s we posted on this blog so far! I love when you can add a nostalgic, sentimental touch to DIY’s.

Incorporating maps into decor is such a lovely look. Imagine how cool this will look when it’s lit up! Be sure to pick a map of someplace that means something. I would probably pick a map of Oregon, or maybe Venice. Those two place are some of my favorites in the world!

Map lamp

Head on over to Silver Boxes to see the tutorial! 

Happy DIY-ing!

4 Summer Shirt Cut Out Ideas

Love these DIY ideas as much as we do? Stay up to date on our latest findings by liking our facebook page at Home and Heart DIY Facebook!

It’s so easy to get sick of the clothes in the closet! It seems like lately, I’m trying on 9 different outfits before I feel I can leave the house! (I hate it when that happens…).

Here are four easy DIY’s to spruce up the clothes you’ve already got without spending any money!

1. The Backless Tee

This is definitely the most simple of the four. Take an old tshirt, and cut a narrow triangle section out of the back. (CAUTION: don’t cut too high up, unless you don’t want to be able to wear a bra!) Tie the two ends you’ve just created together and there you go!

Backless

2. The Striped Back Tee

On the back of a tshirt, begin cutting slits about two to three inches apart. Leave at least three inches on the bottom. After you’ve cut your slits, cut the hemline off of the bottom of the shirt. Proceed to cut that into two and half to three inch sections. You’ll use those fabric pieces to wrap around the sections of the tee you cut. You can throw a stitch or two in there to secure the piece, or (like me) you can use a dab of hot glue.
Cut out stripes

3. The Diamond Back Tee

This looks much more complicated than it actually is. The most important part is marking off the sections you don’t want to cut. Trace a diamond shape on the center of the back of a tshirt (you can do just about any shape you’d like here!). The mark a one to two inch border around the back of the shirt. Again, this is where we’ll stop cutting, so it’s really up to you where you want this to be. Take a pair of scissors and begin cutting narrow strips in between the diamond shape and border. Do this all the way around the shirt.
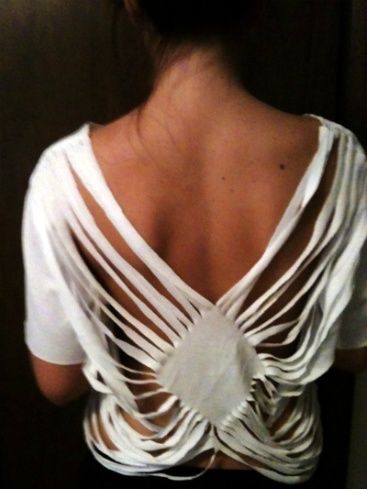
Diamond Cut Out

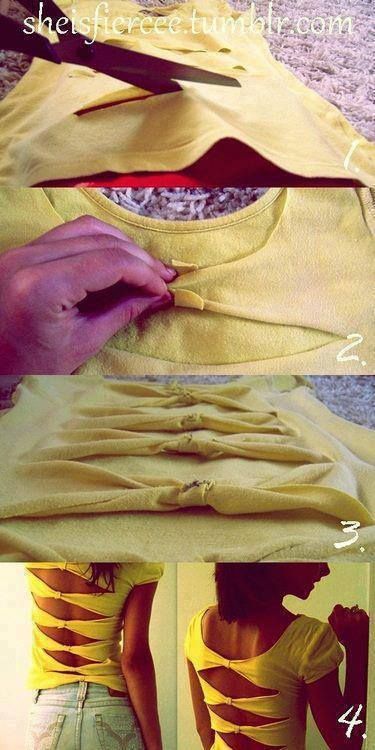
4. The Bow Back Tee

This DIY does require some sewing. It’s a more complicated version of the striped back tee. Use a scrap fabric you’ve got lying around that  you like. Cut it into three by five inch strips. (The amount of these you cut will depend on how far down the shirt you want to go). Cut the same amount of one by two inch strips. Next, cut a section out of the back of the tshirt. I’d make sure it was no more than six inches wide and no less than four inches. Head to the sewing machine! Sew in the bigger sections on each side of the section you cut out. After you’re finished with that, take the smaller fabric pieces, wrap it around the center of the bigger fabric pieces, creating the bow shape. Throw a stitch or two in there to secure the middle piece (or use hot glue again!)
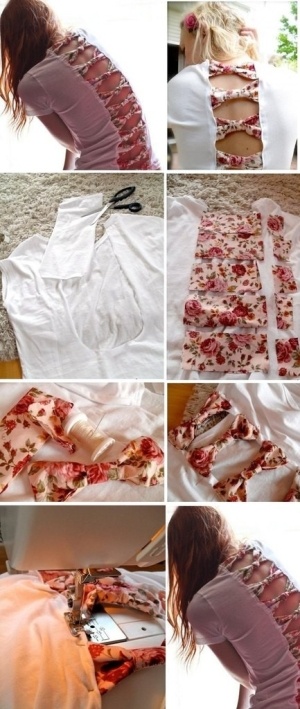
Bows

Happy DIY-ing!

(Sources: Pinterest)

DIY Chrysanthemum Mirror- from Plastic Spoons!

Love these DIY ideas as much as we do? Stay up to date on our latest findings by liking our facebook page at Home and Heart DIY Facebook!

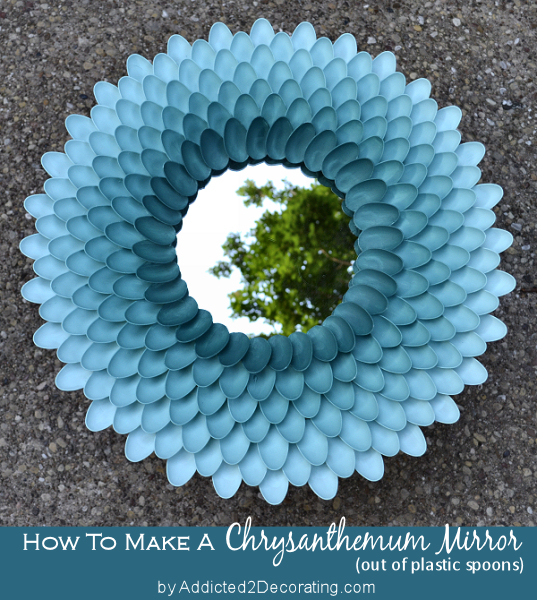
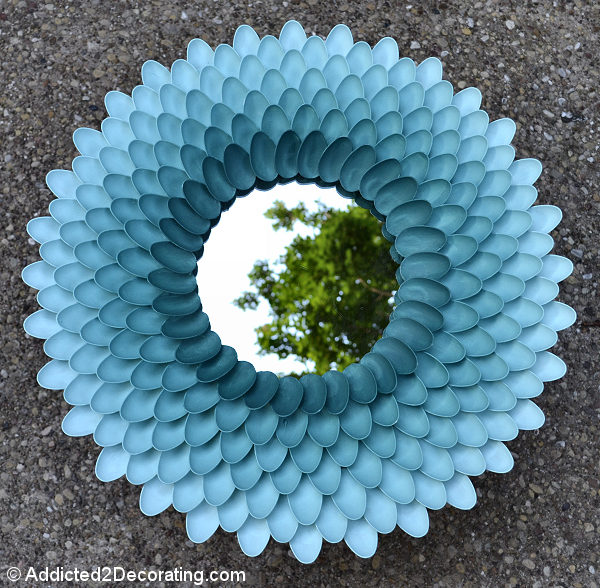
Now this is a DIY that will really impress all you crafty types out there. Using the most basic materials to make this beautiful Chrysanthemum Mirror!

chrysanthemum-mirror2

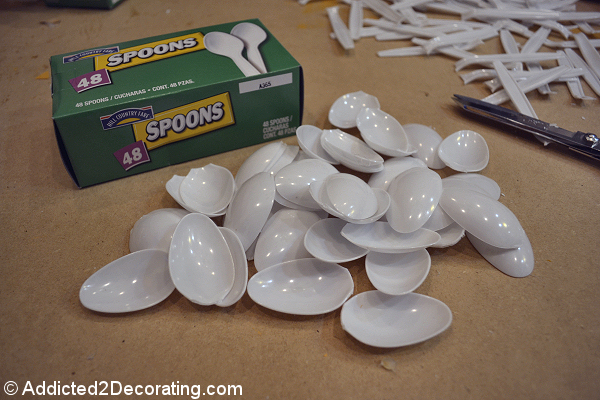
Regular store bought plastic spoons…
chrysanthemum-mirror-1

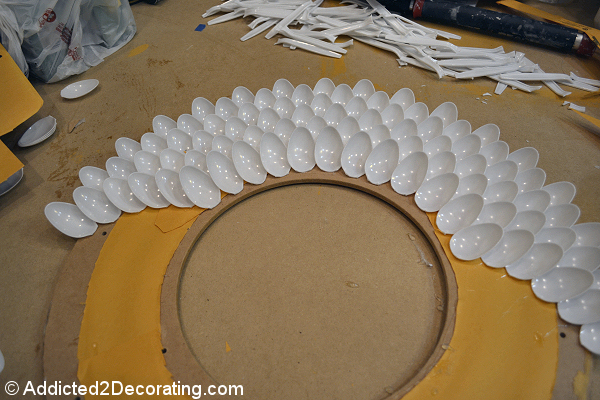
Patterned in order like so…
chrysanthemum-mirror-5

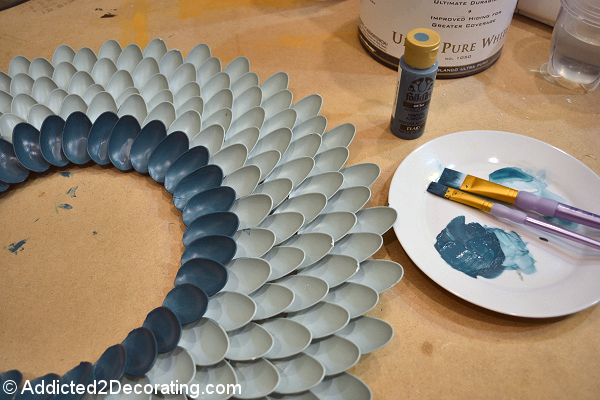
Painted…
chrysanthemum-mirror-8

And Bam! This gorgeous Chrysanthemum Mirror!
chrysanthemum-mirror-13

Pretty amazing! Check out the original post at Addicted 2 Decorating for the full step by step instructions. Happy DIYing!

Etched Wine Bottles

Love these DIY ideas as much as we do? Stay up to date on our latest findings by liking our facebook page at Home and Heart DIY Facebook

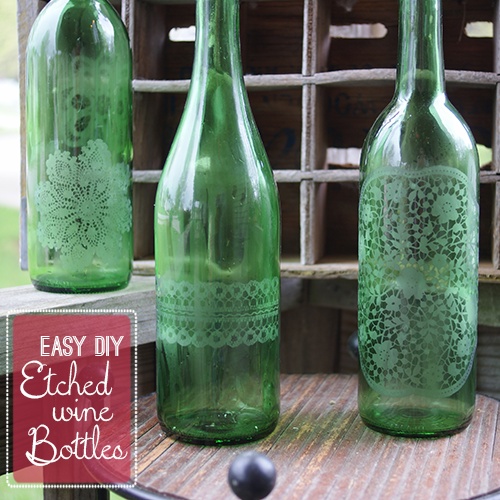
Okay, I’m officially adding wine bottle to our list of thing we love finding DIY’s on! There’s just so many wonderful things you can do with them, and this DIY is no different!

Supplies you’ll need: wine bottles, stencils, etching cream. (That’s it!)

Etched Wine Bottles

This is the perfect project to satisfy that DIY craving in an afternoon – quick, simple and easy! Click here for all the steps!

Paint a Chair!

Love these DIY ideas as much as we do? Stay up to date on our latest findings by liking our facebook page at Home and Heart DIY Facebook

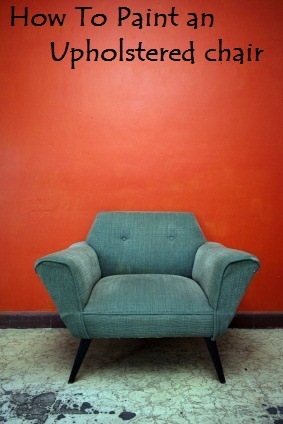
A friend recently told me that she and her daughter were going to paint a couch. As funny as that may sound, it turned out beautifully, and I’ve been on the hunt for a tutorial to do the same! It’s such a great way to revamp an old piece of furniture without breaking the bank!

Upholstered Chair

All you need is some fabric paint! You can incorporate a fun pattern adding a little creativity and fun to your furniture. The easiest way to do that would be to find a pattern you like online, and print it out, creating your own stencil.

Happy DIY-ing!

(Source)