 Follow
Love these DIY ideas as much as we do? Stay up to date on our latest findings by liking our facebook page at Home and Heart DIY Facebook!
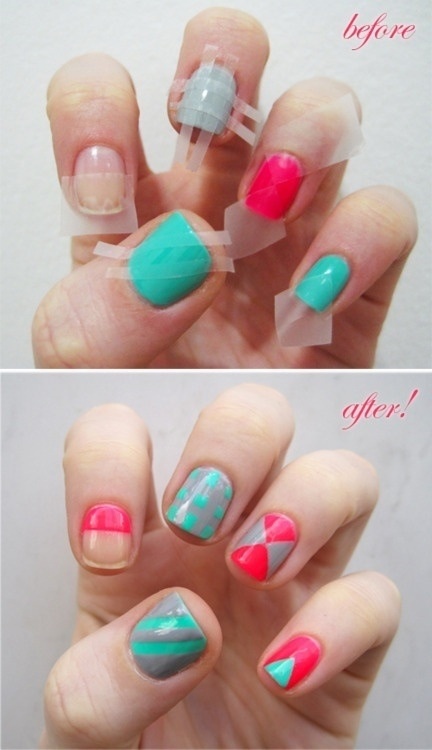
This tutorial looks intimidating at first. It’s hard to know where to start to get the finished look! All you need are two or three polish colors (it’s totally up to you how many!) some scotch tape, and some patience!
The trick is to paint the entire nail one color first and let it completely dry. (I usually wait 24 hours – this is where the patience comes in. If you don’t wait long enough, the tape will ruin your base color.) You then cut the tape into the shapes you want to see on your nails. I’d recommend following that top picture exactly, when you’re just starting out. Place the tape on your nails, really making sure that it’s stuck completely to your nails. Paint over the top of the tape with a contrasting color, then remove the tape quickly before the polish can dry. And that’s it! Apply a shiny top coat if you’d like, and you’ve got some pretty amazing nails!